Installation Procedures

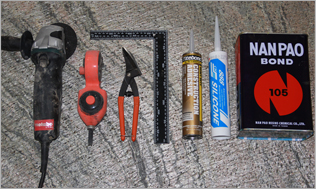
Before the construction, make sure the wall surface is smooth and even, and any visible dirt and moisture on the wal. If needed please smoothen the wall, and clean off any dirt. Make sure the wall surface moisture is less than 30%, please and confirm the correct product model.

Because each piece of natural stone veneer possesses its own unique surface textures and colours, it creates a natural appearance on the installed wall.
[The tolerance of the natural stone veneer is +/- 0.5cm.]

1. Preparation Work Before Installation
  Identify the level line, measure out the vertical bisector, use the carpenter's ink marker to draw out the reference line, apply oil based adhesive starting from the center reference point on the wall, spread evenly towards each end of the wall without any excessive adhesive, also apply adhesive at the back of the natural stone veneer evenly, then paste onto the wall and press the firmlyl.
2. Adhesive/td>
  Interior may use adhesive gum, speed Kang or the oil based resin for cladding onto the wall. Exterior or high moist area should used oil based waterproofing adhesive : Like AB rubber, too good multi-purpose rubber and so on .....make sure oil based adhesive is used)
3. Cutting
 

Industrial scissors, the carpentry cutting table, flat table saw can all be used for cutting the veneer. (when using any cutting machine, please follow safety guidelines and procedure to ensure safe operations)

4. Joint
 

Between each veneer, make use any gap joint divider. Fill the gap joint with any joint filler which will aesthetic beauty of the veneer.

5.

Clean and maintenance


Use clean water for cleaning, if needs the surface to be glossy, may use Shui La and the acrylic fabric resin or the general stone material maintains the medicinal preparation.